I’ve been a Newtonian reflector user for going on forty years now (can it really be that long?). For much of that time I had thought that all you need is good telescope optics, good collimation, a solid mounting, good atmospheric steadiness, and that’s all there is to it, right? Not so fast. I have come to realize that there’s one more critical element that can make the difference between views that are just good and views that will make you and others cry out “Oh WOW!” The difference can be just as dramatic as the difference between watching television in standard and high definition.
And what is this critical element? It’s the eyepiece. It’s the sometimes forgotten part of the equation that can virtually make or break visual observing. In fact, Al Nagler, the design genius behind Tele Vue optics, calls the eyepiece fully half of the equation. The wrong choice can make a good telescope look bad, but the flip side is the right choice can bring out your telescope’s best.
The eyepiece, sometimes called the ocular, is the element in the optical train that magnifies the image created by the objective. It has to be just as well corrected as the rest of the scope if you want to see everything that’s there. But what do I mean by “corrected”? Correct what? Well, all eyepieces are prone to a number of aberrations, some due to their own design, and some due to the scope itself. What I thought I’d do here is describe these aberrations and how to identify them so that you can evaluate your own eyepieces.
So what got me started on this? It all started for me when I built my 13.1-inch f/4.5 Dobsonian reflector back in the early 1980s. Up until then I had done the bulk of my observing with my 6-inch reflector, which being relatively slow at f/8, let most any eyepiece work quite well. At that time I had a hodge-podge of old, hand-me-down Kellners, symmetricals, and orthoscopics that got the job done in that scope. When I built the 13-inch, I bought a set of three University Optics “Wide-Field” Plossls, with focal lengths of 26, 17, and 10 millimeters. They called them “Wide Field” because they boasted a fifty degree apparent field of view, which isn’t very impressive now but was quite good at that time. They were the first eyepieces I bought new, and my first multi-coated ones to boot. They worked quite well, certainly better than my old ones. But after a time, new eyepieces appeared on the market, which were more suited to the fast focal ratio Dobsonians that were then exploding on the amateur astronomy scene. A couple notables were the University Optics Pretoria, the first eyepiece to correct the coma inherent in fast Newtonians, and the Tele Vue Nagler, with its jaw-dropping ultra wide eighty-two degree apparent field of view. Some years ago, at a Lowbrow open house, I remember trying a Nagler (it may have belonged to John Causland?) in my Dob, and I couldn’t believe my eyes. The field of view was huge, and stars were sharp right to the edge of the field! By comparison, only the middle third or so of the noticeably narrower field was sharp in the Plossls. Up until then I didn’t know what I was missing—but after just that one glimpse I just had to get me some of those. So one by one, as cash became available (it took a couple years), I replaced the old Plossls with a 28mm Pretoria, and 13mm, 7mm, and 4.8mm Naglers. They served me well after that, and while I no longer own the Naglers (as they now belong to various Lowbrows), I still use the Pretoria.
It’s the same telescope, so why the big difference in the quality of the view? The reason is the telescope’s focal ratio. Almost all eyepieces will be sharp and color-free on-axis, that is, in the middle of the field of view, regardless of the focal ratio. With a slow focal ratio of let’s say f/8, the light cone from the objective has a gentle taper, and relatively simple three and four element eyepiece designs will work quite well, even up to the edges of the field. But fast focal ratios, especially f/5 and faster, are another story. Here the light cone converges at a steep angle, and most simple and even some more complex eyepiece designs simply cannot handle it cleanly. Most of the time there are a number of aberrations happening all at once, and while a particular eyepiece design may correct some aberrations well, it falls down with others. It is rare indeed that an eyepiece does a good job on all of them at once, especially in scopes with fast focal ratios. Those that do usually come with a correspondingly high price tag.
In the following discussion, most of my descriptions are admittedly biased towards Newtonian reflectors. The simple reason for that is because that’s all I own! But my descriptions of aberrations attributable to the eyepiece are valid regardless of the type of telescope being used. Also, before you try checking for these aberrations in your own scope, make sure it is collimated well, and in otherwise good working order.
One more caveat. It is seldom that you have a single eyepiece aberration present and no others. So while the illustrations below show each aberration in isolation, it is seldom that way when actually looking through a real eyepiece. There can be several aberrations present at once, and while one or more may dominate, it can make it difficult to determine exactly what you’re looking at.
Okay, enough of the fine print. Let’s cut to the chase and see what these aberrations are, and how to look for them.
Coma is rarely due to the eyepiece. Coma is an aberration primarily of the Newtonian’s paraboloidal primary mirror, which cannot bring off-axis light rays to a single point. I mention it here because it will usually be visible to one degree or another in a Newtonian, particularly if you are using one with a fast focal ratio. It can sometimes be mistaken for a problem with the eyepiece.
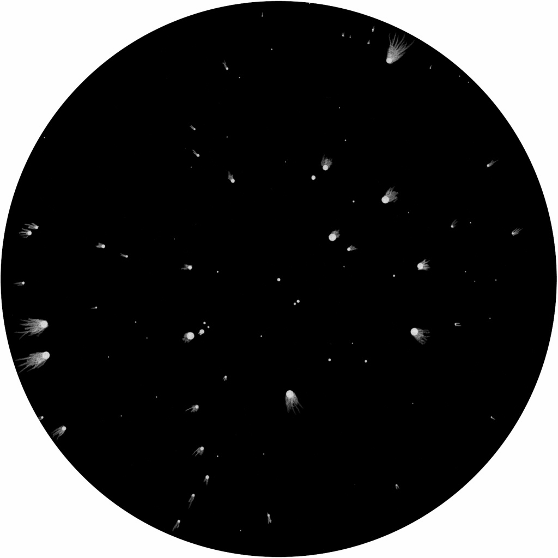
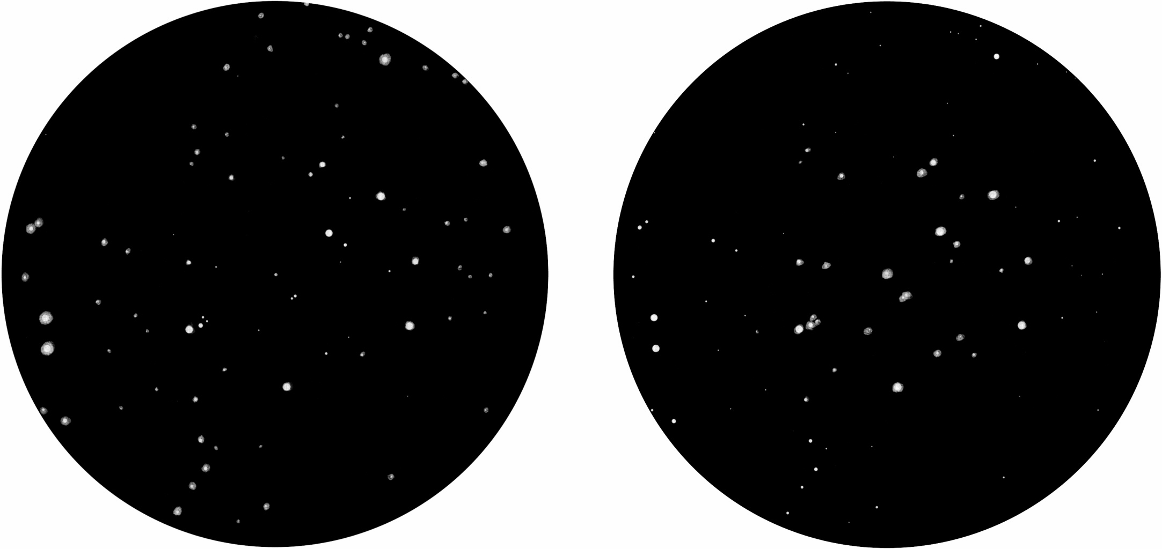
Coma causes stars away from the center of the field of view to look like little comets, hence the name. The farther the star is away from the center, the worse the effect, as also is the case with most all other eyepiece aberrations. And the faster the scope, the more pronounced it will be. It may not be noticeable at all at f/8, but will usually be obvious at f/5 or faster.
This can be a problem with the telescope or with the eyepiece, or even your own eye. It can be induced by poorly figured optics, pinched and/or poorly supported optics, or even poor collimation. In the eyepiece, it is induced by off-axis light rays.
Astigmatism can be difficult to nail down, because it looks different in every eyepiece. It can cause stars close to the edge of the field to appear as crosses, lines, squares, or any number of other odd shapes, such as a the outline of a cartoon sea gull. It can even masquerade as coma. It will be always worse the farther away the star is from the center. It is usually more noticeable in less expensive and/or wide-angle eyepieces, and in scopes with faster focal ratios.
If the aberration is distributed radially about the center of the field of view, and gets worse the farther away from center you look, then it is in the eyepiece. If it is aligned in the same direction throughout the field of view, then it is in the telescope, or it may even be in your own eye.
Distortion is an unequal magnification across the entire field. It is sometimes called pincushion. Usually, the outer regions of the field of view have a higher magnification than at the center. As a result, the outer portions of the field appear to stretch out towards the edge.
An eyepiece that is absent of distortion is said to be orthoscopic. Don’t confuse this with the Abbe Orthoscopic eyepiece design, which has a plano-convex eye lens, and a triplet field lens. There are other eyepiece designs that are also orthoscopic.
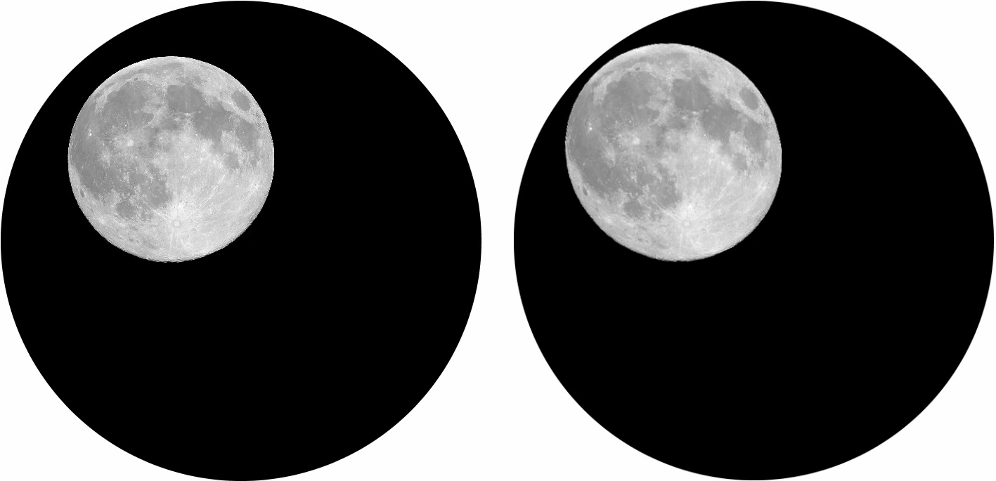
The easiest way to look for distortion is during the day. Focus on a distant, straight line, such as the edge of a building or a telephone pole. Move the object towards the edge of the field. If there is distortion present, then the line will appear to bend, getting worse the closer you get to the edge. To test for it at night, look at a round object, like a planet at high power, or the moon at low power. Move the body towards the edge of the field. If it elongates, and becomes oblong, then there is distortion present. If the distortion is severe, you may even notice it while panning through rich star fields.
This is the inability of the image in the eyepiece to be in focus at the center and edges of the field simultaneously. Rarely this is strictly in the eyepiece. Most all telescopes, in particular those with fast focal ratios, have focal “planes” that are actually curved. So the field curvature you see in the eyepiece is the net effect of the combination of telescope and eyepiece.
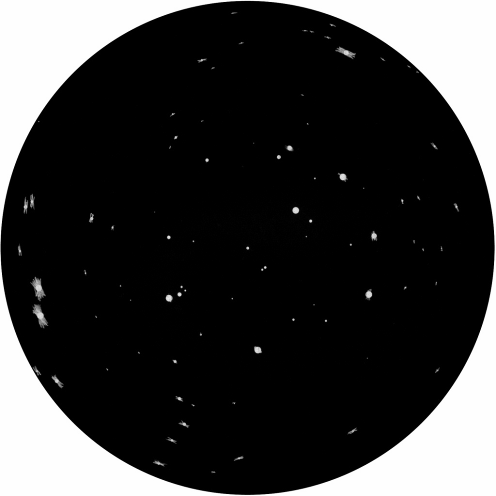
Look at a rich star field, and bring the center of the field to best focus. Now look at the edge of the field. If the stars there are not focused well, then try adjusting the focus. If you can get a better focus at the edge, and now the center of the field is out of focus, then there is field curvature present. Note that if there is significant astigmatism then it may make it difficult to determine best focus near the edge of the field. Mild field curvature is sometimes not noticed by younger folks because their own eyes’ accommodation can automatically adjust for it, while older folks may have more trouble with it.
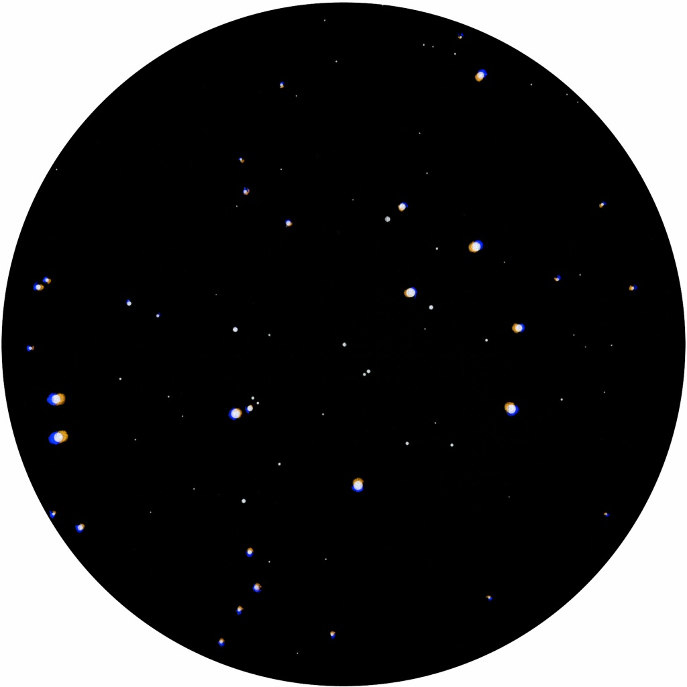
Most all modern eyepieces are very well corrected for color at the center of the field. But off axis (towards the edge of the field) some color fringing may be seen.
Look at a bright star or planet that is well up in the sky, say at least forty-five degrees up. If the object is too low then atmospheric dispersion can cause color fringing that could interfere with the test. Look for blue/violet and/or yellow/orange fringing on either side of the object, getting worse as you get away from the center of the field. Usually the brighter the object the more noticeable it will be. Sometimes an eyepiece that exhibits lateral color in daytime viewing shows little or none under the stars.
Also beware of the scope you are using. Reflectors are all achromatic, but not all refractors are. Except for so-called apochromatic refractors, there will typically be at least some amount of residual color, regardless of the eyepiece being used. Generally this will be more or less constant across the entire field of view, which may make it easier to distinguish from lateral color in the eyepiece, which will be more apparent around the edges of the field. Of course, if you use a high-end apochromatic refractor, then you can probably safely conclude that any color seen is caused by the eyepiece.
Other aberrations, such as spherical aberration, which causes poor focus at the center of the field, and chromatic aberration, which causes color fringing at the center of the field, are all but absent in modern, multi-element eyepieces. But there are also other things that while technically are not aberrations, can still adversely affect the view through the eyepiece.
This is the overall color cast when looking through the eyepiece. It can be caused by the type of glass used, and the type and quality of lens coatings. Generally the differences between eyepieces are subtle, but can be noticeable when doing side-by-side comparisons.
This is the contrast between the bright and dark areas of the field. It is affected by the clarity, number, and thickness of the glass elements in the eyepiece, and the quality of the lens coatings. It affects the darkness of the sky background, and the faintest objects you can see in the eyepiece. When comparing two eyepieces for contrast, be sure to use the same telescope and the same magnification. The lower the magnification the brighter the sky background will be, and this may be mistaken for lower contrast when compared against an eyepiece operating at a higher magnification.
These are caused by lower quality lens coatings, whereby light reflecting off the lens and internal surfaces becomes visible. Sometimes there can be reflections off the ground edges of the lenses, or even from poorly blackened internal surfaces of the eyepiece barrel. Fully multi-coated eyepieces, where every air-to-glass surface is multi-coated, will minimize such reflections, as will those with blackened lens edges, and good internal baffling and blackening.
This is the distance between the eye lens and where you need to place the pupil of your eye for optimal viewing. In low-power, long focal length eyepieces, eye relief is usually ample. But at short eyepiece focal lengths, eye relief can be very short, forcing the observer to put their eye almost right on the glass. And if you have to wear eyeglasses, too little eye relief may make an eyepiece unusable. Some newer eyepiece designs are now available that have a constant, long eye relief, even at very short focal lengths.
This is the angular diameter of the field of view as it appears to your eye. Older eyepiece designs, like older Abbe Orthoscopics, might have an angular field of view of maybe forty or forty-five degrees, while newer, complex eyepiece designs might sport eighty degrees, or even more. The thing to keep in mind is that the wider the apparent field of view, the more difficult it is for the eyepiece designer to keep all the aberrations within acceptable limits across the entire field.
Many modern eyepiece designs, while being very well corrected optically, require very accurate positioning of your eye on the exit pupil. If your eye is not exactly centered, and at the right distance from the eye lens, then portions of the field may “black out”. Often this blacked out portion of the field is shaped like a kidney bean, hence the name. Such eyepieces are often designed with a positional eyecup, making it easier to hold your eye in the correct position.
Unfortunately, on this side of heaven there is no such thing as perfection. Everything is a compromise. Eyepieces are no exception. The designer must balance correction of one aberration against correction of another. And then trying to make it work with a wide field of view, and work with fast focal ratios, and with adequate eye relief, and make it affordable, well, you can see that it can’t be easy. The good news is that there are some eyepieces out there that do a very good job of correcting most everything at once. The bad news is that they almost invariably come with hefty price tags. But the alternative is to pay less and put up with more. Sorry, no free lunch. Like I said, everything is a compromise.
So now I’m at it again, another round of revamping my eyepiece collection. Now that I have two f/4.5 reflectors, I’ve been doing some reevaluating of what I own, and evaluating some I don’t own, at least not yet. I’ll let you know the end result—but that will have to wait for another time.