Several months ago, I posted a newsletter article about the latest addition to my telescope collection, a 65mm f/5.6 ED refractor that I and other Lowbrows acquired form Burgess Optical. In that article I indicated that I was experimenting with doing some astrophotography with it, so I thought I’d bring you up to date with what I’ve done so far.
Now before I start a disclaimer is in order. This is most certainly not an exposition on the state of the art. On the contrary, I’m using what most would consider outdated equipment. I’m using, of all things, a 35mm film camera, and of course, film. Film??? How 20th century! I can hear the collective “gasp!” as you all read this. No DSLRs, no CCDs, no autoguiders, no field flatteners, no computers (at least not in the field). So obviously, my purpose here is not to show you what can be done with modern equipment. But what I do hope to demonstrate is what you can achieve by marrying “primitive” equipment with modern day image processing techniques to produce pleasing results, and without spending a ton of money. Chances are, you already own much of the required equipment. In a nutshell, I’m describing doing astrophotography “The Lowbrow Way”.
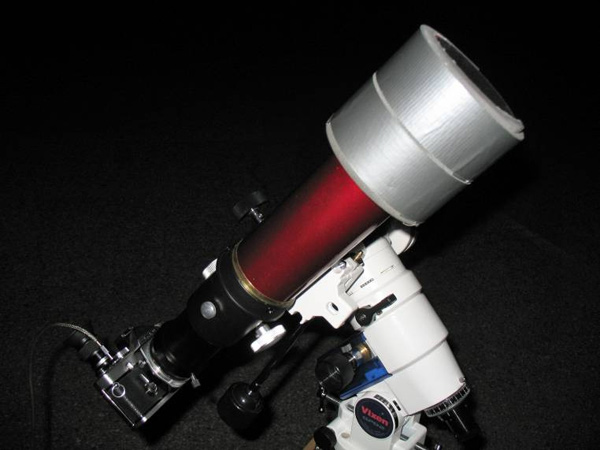
For the telescope, I’m using my ED 65 Backpacker refractor. In case you missed it, here’s a link to my previous article describing this little scope: http://www.umich.edu/~lowbrows/reflections/2009/dscobel.31.html. But what else? For the camera, I’m using my trusty, old Olympus OM-1 35mm single lens reflex (SLR). I bought it in the early 1980’s hoping to do some astrophotography with it. Little did I know I’d be doing that more than 25 years later! The Backpacker has a two-inch focuser, so I mount the camera to the scope using a T-ring and two-inch camera adapter. The camera is mounted at the scope’s prime focus, replacing the eyepiece. Of course, for long exposures, you need a tracking mount, and I use the Vixen Great Polaris D2 German equatorial mount I had purchased for my 6-inch f/4.5 RFT Newtonian. With those major pieces, plus a few other refinements, such as a cable release, a right-angle viewfinder magnifier, and a computer mouse pad converted into an insulator for the dew shield (very Lowbrow), it was a simple matter to assemble them into a low-cost, admittedly basic astrophotography rig. Here’s a picture of my setup:
If you want to do this yourself, then here are a couple tips. First, you need a mount that tracks precisely and that you can polar align very accurately. My Vixen GP-D2 has a built-in polar alignment scope with illuminated reticle. With it, I can get very close to the pole without using more accurate methods, such as drift alignment, though I could if I weren’t so lazy. Also, it pretty much has to be an equatorial mount. If you use a tracking alt-azimuth mount, there will be field rotation during the relatively long exposures described here, ruining your images. The other issue is focus. With a digital camera, you can get instant verification of your images’ focus. With film, you have no such luxury—you have to wait until after you get the film processed before you know if you got the focus correct or not. I have a right-angle viewfinder magnifier for my Olympus, which lets me magnify the viewfinder image 1.2 or 2.5 times. I’ve found that without it I have trouble getting the focus correct, but good focus when using it. I compose using the 1.2x setting, then switch to 2.5x to get the focus as good as I can get it visually. Of course, this means the view must have at least one relatively bright star near the center of the field on which to focus.
I’ve always preferred slide film over print film for astrophotos, and my slide film of choice lately has been Kodak Elite Chrome 200, also known as E200. The characteristic that makes it great for astrophotos is its red sensitivity. This makes it particularly well suited to photographing emission nebulae, which often emit strongly in the red end of the spectrum. The overall color balance on long exposures tends to be a little on the red side as well, so the sky background ends up being a little red or purple, depending on the amount of light pollution present. This is the film I used for the astrophotos I took at the Okie-Tex Star Party in 2007 see:
http://picasaweb.google.com/djscobel/OkieTexStarParty2007?feat=directlink,
using the camera and its lenses only, without using a telescope. Some of those exposures were more than ten minutes long, which was fine for my longest lens, a 200mm. But what about the Backpacker, with a focal length of 385mm, almost double? My mount has a drive motor for right ascension, but none for declination, so unless I buy a dec motor and a dual-axis drive corrector I can’t really guide with it. So before exposing a lot of film, I needed to test how long of exposures I could get away with. At the Black Forest Star Party in 2008, I took a handful of images with my new rig and found out that I could take up to ten minute exposures, unguided, without an objectionable amount of trailing. At f/5.6, the sky does not fog out (at least from dark sites), and nebulae still register quite well.
Back at my former job I had shown some of these test images to a co-worker, who does astro-imaging himself, although with a digital SLR. I was telling him how my images were okay, but they were a little on the grainy side. He suggested that I try taking several exposures and stacking them. I thought to myself why not? Single exposures are indeed rather grainy, but stacking several ought to provide the same benefits as it provides digital images. Just as with digital images, combining several “identical” exposures by stacking increases the signal-to-noise ratio. It helps average out any graininess, and improves the overall detail and contrast. Besides, after scanning the slides, they will be digital images, right?
I now had a plan. The first week of November last year, we were treated to a few nights of clear, moonless skies, and I took advantage of them. I spent two nights down at Lake Hudson State Recreation Area, and took six, ten-minute exposures each of the North America and Pelican nebulae, the Veil nebula complex, the Horsehead and Flame nebulae, and the Rosette nebula. Four hours, 24 exposures, one roll of film.
The first thing to do was have the film developed. Yeah, I know, how primitive. The Kodak E200 film I used is very tolerant of push-processing, without a lot of added graininess, so I had the developers do a two-stop push to ISO 800. I also had them leave the film unmounted and uncut. I didn’t want to give them the opportunity to cut the film through the middle of the images.
After I got the film back, I scanned it using my flatbed scanner that can also scan film. The resulting scans didn’t look great, but I could see that there was a fair amount of information in the images that was just waiting to be teased out on the computer. Here’s an example of one of the raw scans, before doing any processing:
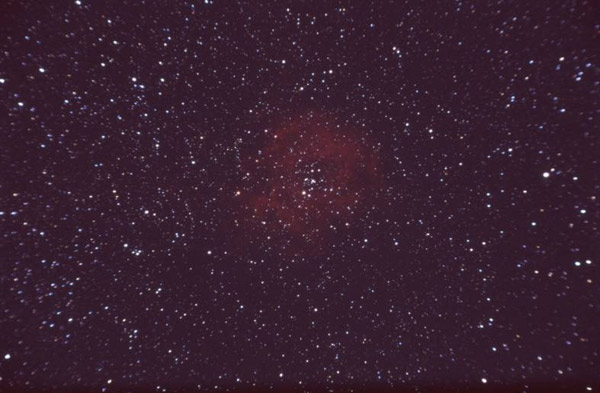
Not very impressive, huh? The Backpacker has a lot of field curvature, and as I stated earlier I do not have a field flattener. The result is all the smeared stars in the outer portions of the above image, particularly in the corners. You can also see the purplish cast of the sky background. But the nebula, while muted, registered well enough, and displayed a promising amount of detail.
The first thing I did was to crop all the images to remove the bulk of the smearing due to field curvature. I then went on to stack them using Registax 4. Now I had tried earlier versions of Registax and had a lot of problems with it, but I was surprised at how well version 4 worked. I found it to be quite robust and intuitive to use. Now describing the process of stacking could fill an entire article, so I’ll skip all the details. The one thing I will mention is the price—Registax is free. I like that. Here’s the image after cropping and stacking:
After stacking, it was on to processing in the digital darkroom. Most folks use Adobe PhotoShop for doing this. It’s a very, very capable program, plus there are some extremely useful plug-ins for it, specifically for processing deep-sky images. Hence its popularity. But it’s not cheap. A copy of it costs much more than what I paid for the telescope. Because PhotoShop isn’t cheap, but I am, I use JASC Paint Shop Pro. You can usually get a one-version-old copy online for under a hundred bucks, and it will do most if not all of the processing tasks you need. For these images I used version 8, which is rather old, but it gets the job done.
As with stacking, I could easily write an article’s worth of explanation of how I digitally processed the images, so here’s a brief tutorial describing what I did. Just remember that there’s something of an art to doing this. Beauty is in the eye of the beholder, and it’s also in the eye of the digital processor. I’m not saying that this is the “correct” way to process images, just that this is how I did it. Plus, this is a relatively simple tutorial, so if you are just getting started doing digital image processing then this might provide you a good starting point. And it applies equally well to scanned film or digital images.
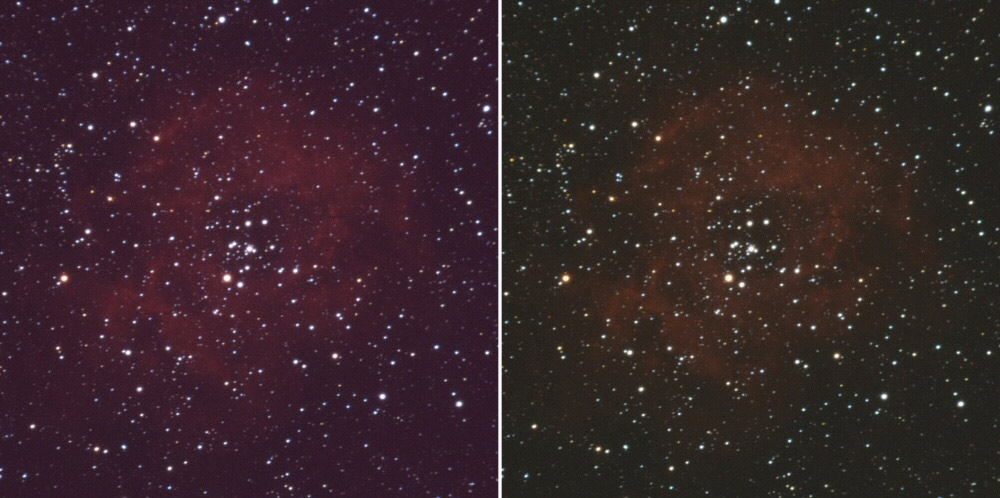
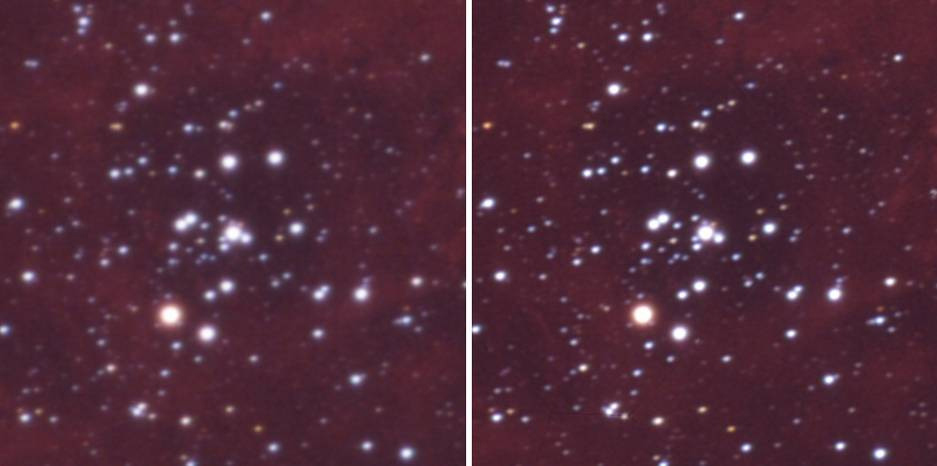
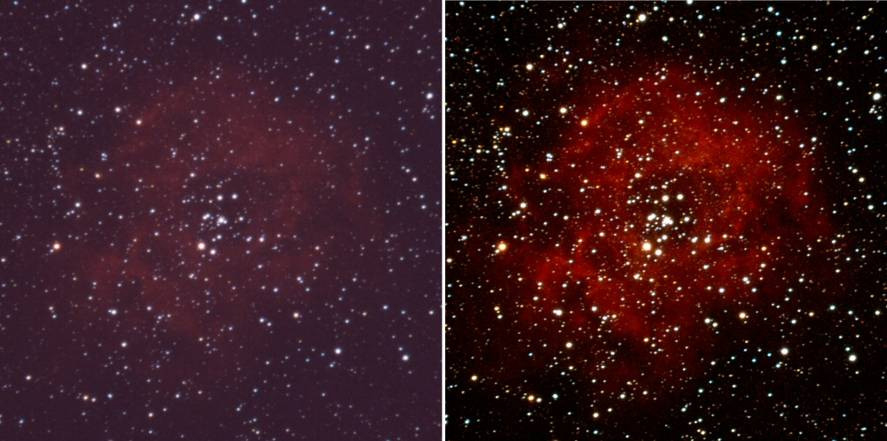
So how much does stacking and processing improve the image? It’s a little difficult to see the total improvement with the incremental changes shown above, so here’s a comparison between a single original scan and the final image:
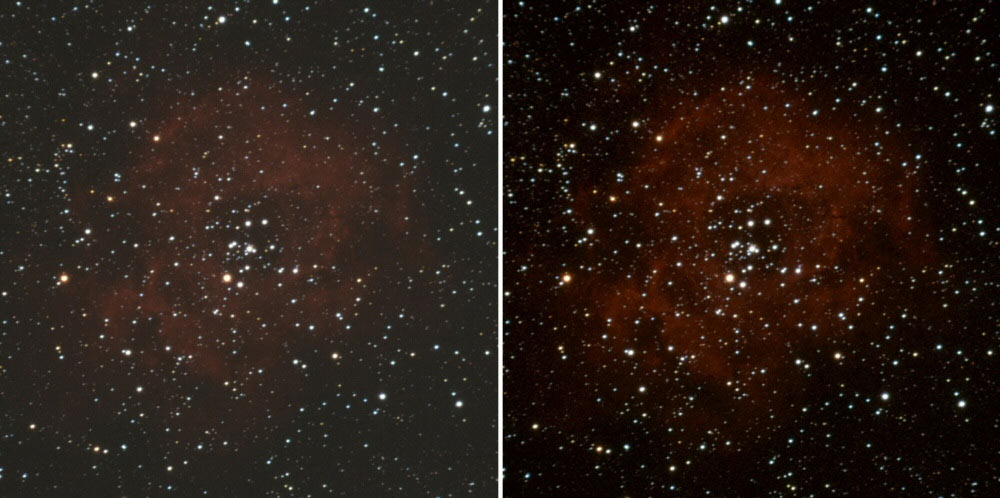
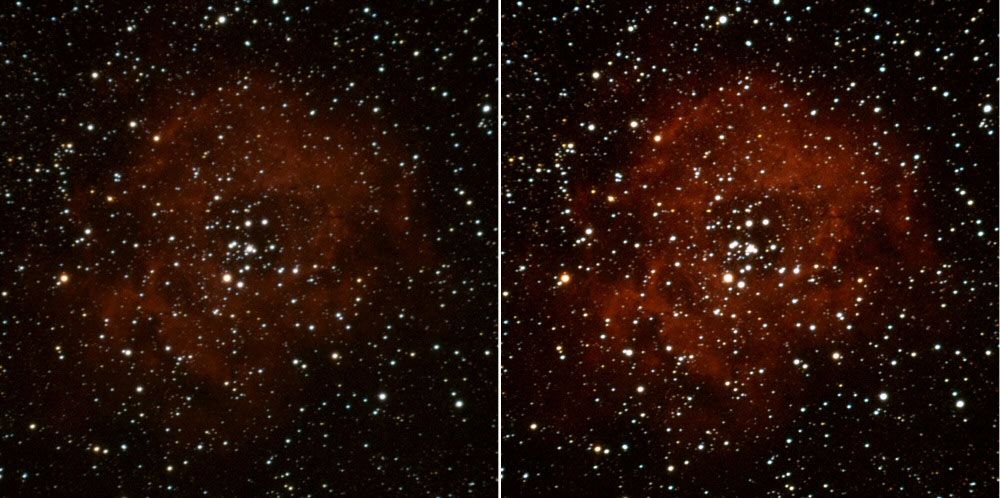
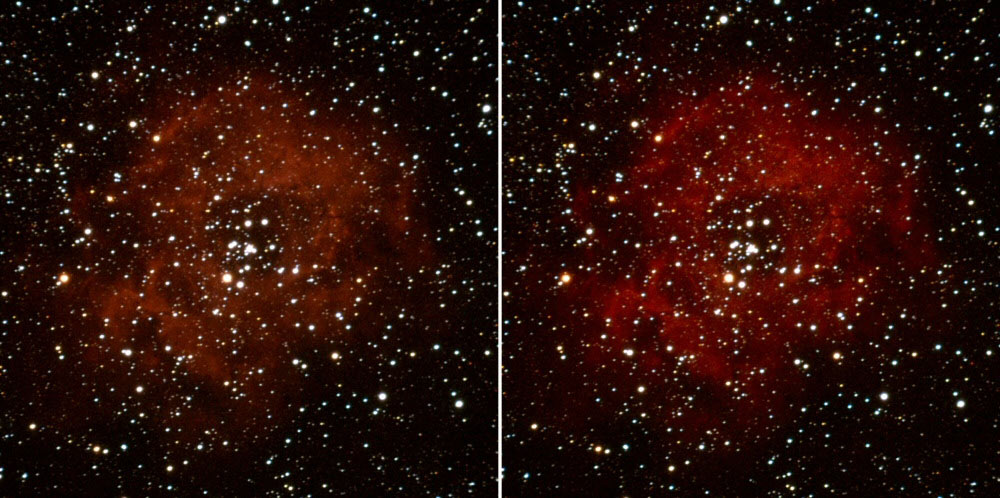
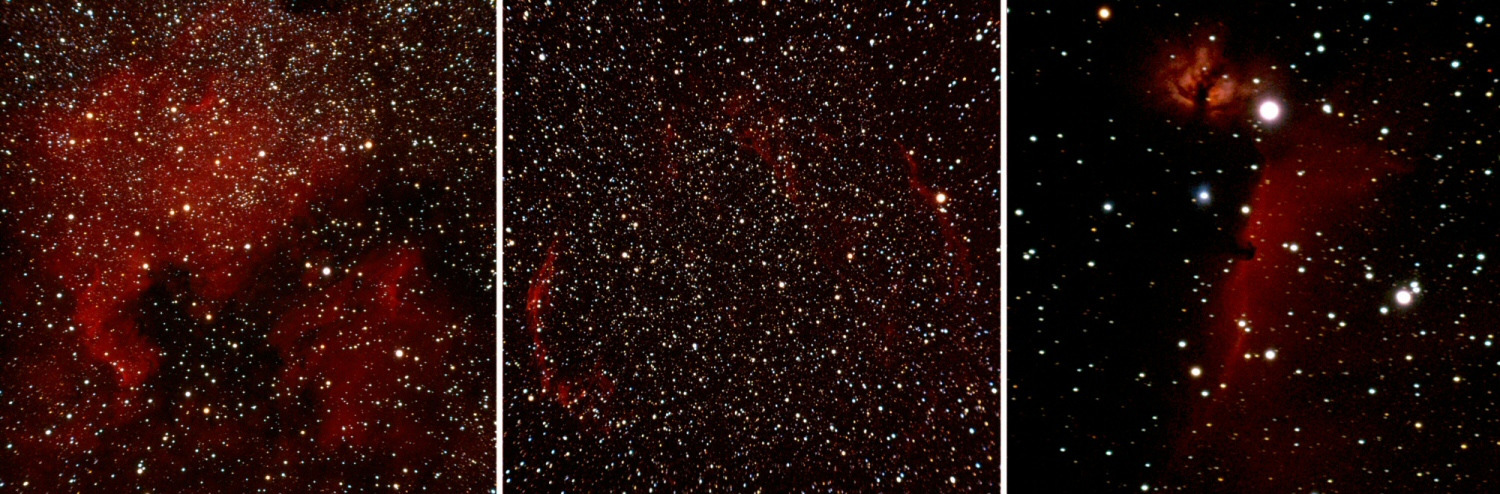
I used the same techniques for my other three images. I was able to use pretty much the same image processing values for all of them, with only minor differences from image to image. Here are the finished versions of those:
In conclusion, are these images as good as what others are doing nowadays with CCDs, DSLRs, and premium refractors? Perhaps not, but still I’m quite happy with the outcome. They’re certainly better than what I expected when I first started. And considering my monetary outlay, I’m really happy with the results. And isn’t that the Lowbrow Way?