Last time we “talked” (see the first article in this series in the July, 2011 issue of Reflections — was it really that long ago?), I described the mechanical construction of my latest telescope, a 16-inch f/4.6 AstroSystems TeleKit Dobsonian reflector. The heart of the scope, a superb primary mirror made by John Lightholder, provided the inspiration for the title of these articles. More on that mirror later, but first things first.
Now before I go on, I want to remind you that the purpose of these articles is not to provide a critique of the AstroSystems TeleKit. Rather, my purpose is to describe my experience in building my scope, to hopefully provide useful information in the event that you decide to build one of your own. If some day you do indeed decide to build your own TeleKit, then I urge you to talk to me first. I’ve learned (the hard way sometimes) some tricks and where deviating from the stock kit can pay you dividends during the build, and later when you’re out with the scope under the stars.
Sanding and Finishing
If you remember in the first installment, I mention how I completed the main assembly of all the wood parts before doing any sanding and finishing. Now I think I know why the kit instructions have you build, sand, and finish each sub-assembly as you go along. I had my reasons for doing so, but saving all the sanding and finishing for the end takes a really long time! As you can see from the pictures below there are a LOT of wood parts! Besides the large assemblies (upper cage, mirror box, and rocker box), there is the ground board, mirror cell, altitude bearings, filter slide, wheelie bars, wheelie bar attachment knobs, upper truss connector plates, mirror hold-downs, and mirror cover. Each one requires an initial fine sanding, and three or four coats of marine quality polyurethane, inside and out, with sanding between coats. Plus, the main assemblies have all kinds of details such as cut-outs, holes, standoffs, gussets, and other details, so you have to sand in and around each one, and clean them out thoroughly before applying the next coat of polyurethane finish. It ended up taking about three hours just to do the sanding and prep work, and another two hours to brush on the polyurethane. Doing this four times added up to twenty some-odd hours of work just to get everything ready to assemble. But all the work was worth the trouble, as the result is not only a beautiful, natural Baltic birch wood finish, but also one that is virtually impervious to dew.
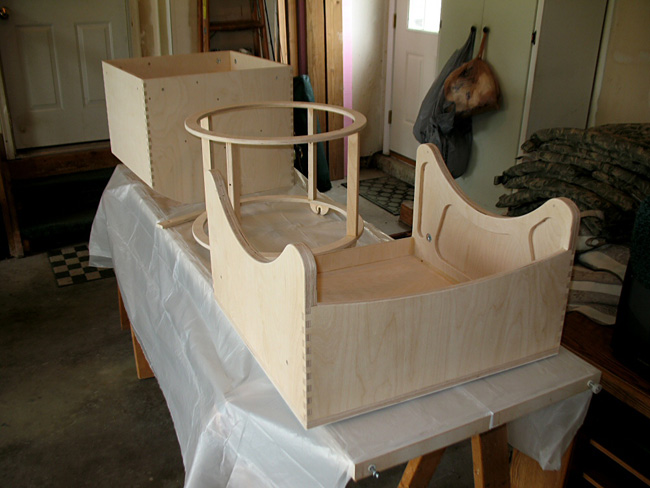
Besides all these large assemblies...
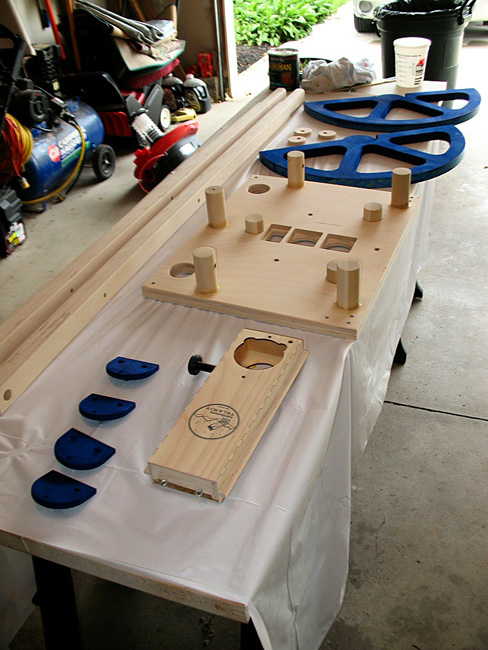
...all these had to be sanded and finished too. Not shown here are the ground board, the four wheelie bar attachment knobs, and the mirror cover.
One thing I did to personalize the scope was to add a little color to it. Blue being my favorite color, I wanted to incorporate some blue into the scope, to go with the blue body of the Moonlite focuser. I talked to Eric Webster, of Webster Telescopes, about how he colors the wood parts in his telescopes. He told me about a dye he uses, and how to apply it. Following his instructions, I colored the altitude bearings and the upper truss connector plates blue, to approximate the color of the focuser.
After applying all the clear finish, the inside of the mirror box and the mirror cell needed to be painted flat black. This involved a lot of taping and masking, to prevent overspray getting on the visible portion of the Baltic birch exterior. In this process, I learned (the hard way) a thing or two about modern paints, specifically which ones work better than others. If you end up doing your own scope, be sure to ask me first or refer to my online photo album (a link appears at the end of this article).
Making It Mine
After applying the finish, final assembly was pretty straightforward, and pretty much went according to instructions. After all, I had already assembled it once for focus testing. But per usual, I added my own enhancements to improve the performance and functionality of the scope. I'll just touch on the major ones here.
Now any of you who use a telescope in our Midwest locale know that dew control is a must-have. So I had to deliver electricity from the batteries in the mirror box to the upper cage. For that I added a small panel, with a pair of switched RCA-style phono jacks, to an inside corner near the top of the mirror box. I then made up a pair of two-conductor cables, with right-angle RCA phono plugs at the bottom, and Anderson Power PoleTM connectors at the top. These plug into separate circuits at the bottom of the upper cage, one for dew control on the finders, the other for powering the secondary mirror anti-dew heater. VelcroTM straps secure the wires to one of the truss poles.
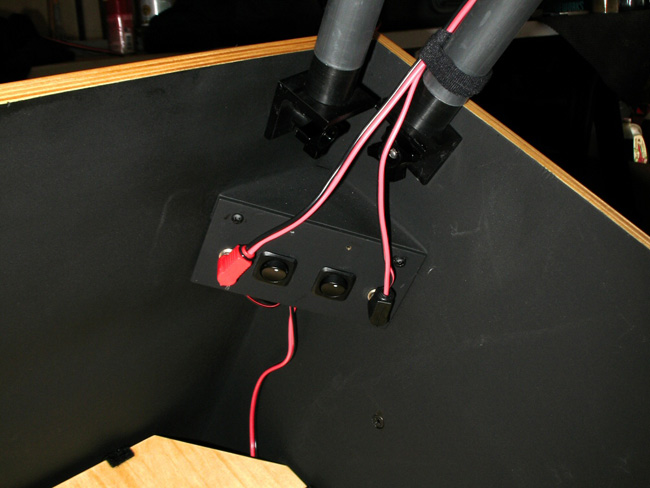
This little panel holds a pair of phono jacks, each controlled with a rocker switch. A pair of cables, with right-angle phono plugs, delivers power to the upper cage to run the anti-dew heaters.
A strip of self-adhesive, two conductor doll house wiring tape, applied to the side of one of the spider vanes, delivers power from the outside of the cage to the secondary mirror holder. Its ultra-thin copper conductors add almost no thickness to the spider vane, and they virtually disappear after painting them flat black.
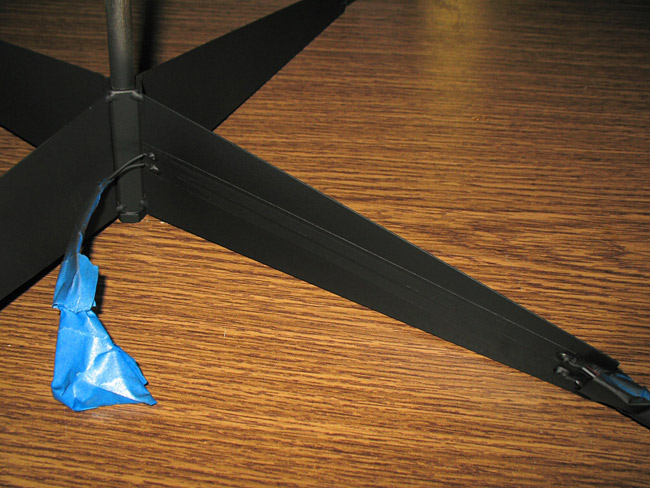
Power is delivered from the outside of the upper cage to the anti-dew heater behind the secondary mirror by a length of two-conductor doll house wiring tape applied to one of the spider vanes. The doll house wiring tape is very thin and adds no appreciable thickness to the spider vane. The photo album (see link at the end of the article) shows you how to do it.
One “feature” of most truss-tube Dobs is that the open-backed primary mirror cell, if not baffled somehow, lets ambient light from below the bottom of the telescope to enter the light path from around the primary mirror. So I needed a baffle of some sort. As luck would have it, I used FRP (AKA glassboard) for the bottom of the rocker box, so I did not use the laminate that came with the kit that was intended for that purpose. A sixteen inch hole in the center, a couple reinforcing strips of wood around the edges to keep it from bending, and some flocking material for the top and blat black paint for the bottom to cancel virtually all reflections, and it's now nice and dark at the bottom of the mirror box. All that's seen from the focal plane is the outline of the primary mirror.
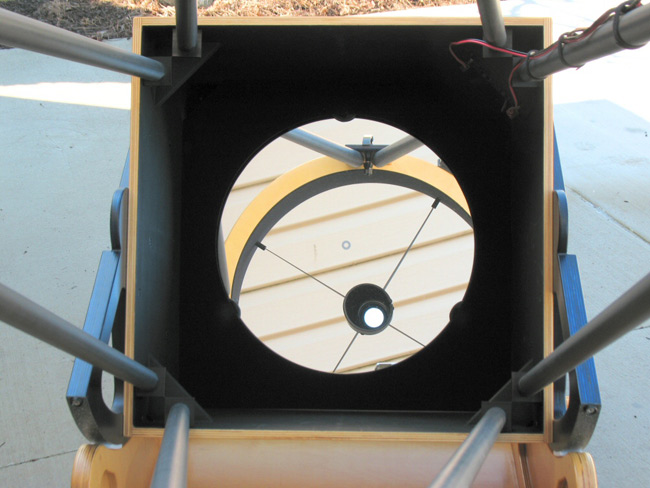
A baffle in front of the primary mirror blocks all stray light from behind the mirror entering the light path. The photo album shows before and after pictures.
Some black flocking material to line the inside of the mirror box, and to cover the inside surface of the filter slide, rounded out my baffling efforts. Probably not as good as Papa Smurf with his annular baffles, but a big improvement over the stock kit.
Just ONE Little Problem...
One thing that I wish I had planned a little better ahead of time was the placement of the TelradTM and the 8 x 50 finderscope. Being right-eye dominant, I use my right eye when looking through the finders. So I built the scope with the focuser on the left side of the tube (as viewed from the rear of the scope). Most Dobs are built with the focuser on the right side, and the TeleKit is no exception. (Incidentally, this has always been a curiosity to me because I imagine that there are more right-eye dominant folks than there are who are left-eye dominant). The problem is that the pre-drilled holes for the upper cage assembly put the focuser at a good angle when it is on the right side, but a not-so-good angle when it is mounted on the left side as I built mine. As a result, I could not come up with a way of placing both finders where both would be easily accessible. Because I use the Telrad more than the 8 x 50, I was able to put the Telrad in a good location, but the 8 x 50 would often be in a very awkward position, making it nearly impossible to look through when the scope was pointed at high altitudes.
It was something I would have to learn to live with, but after just a couple observing sessions I had enough. That's when I decided to completely rebuild the upper cage from scratch. Yes it sounds drastic, but it had a couple benefits. One, I could lay it out pretty much the way I wanted. Two, I had heard about Protostar's FlockboardTM, a Kydex-like material with flocking on the inside, that is designed specifically for the baffle/liner of the upper cage of truss-tube Dobs. The scope would end up with better placed focuser and finders, plus the inside of the upper cage would be as non-reflective as could be. I'm pretty handy with a table saw, drill press, and router, so how hard could it be?
As usual, plenty hard! It required only a little layout work in a CAD package, but a LOT of work measuring and duplicating the original parts. After about eight hours of painstaking layout, cutting, drilling, and routing, the parts were finally ready to glue up and finish.
After adding the Protostar FlockboardTM baffle, and installing the original filter slide, focuser, and finders, I was very pleased with the result. It is virtually indistinguishable from the original, and now I can comfortably look through both finders. Plus the flocked baffle provides a very dark upper cage interior. Yay!
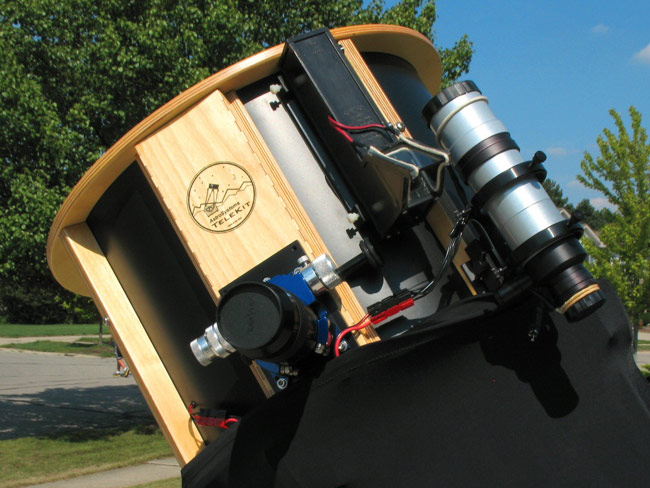
The cloned upper cage assembly. Thankfully, I did not also have to reproduce the focuser mount with the built-in filter slide. Notice how the TeleKit design places the focuser very low in the cage assembly. That provides a longer “tube extension” to help prevent stray ambient light reaching the focal plane.
Was it Worth It?
If you recall from part one of this series, one of my primary goals in replacing Papa Smurf (my thirteen inch, solid tube Dob that I used for more than 25 years) was to present a smaller footprint in the cargo area when transporting it in my car. Well, that goal has definitely been accomplished. The upper cage nests in the mirror box, which in turn rests in its normal location in the rocker box, so the main part of the scope occupies a cube about two feet on a side. Now there are additional things to carry that I had not considered, such as the wheelie bars and ramps for rolling it into and out of the car, and the bundle of truss poles. But even with those additions, I still have substantially more room in the back of my little hatchback wagon for carrying other gear.
A question I wrestled with before I started the project was whether to build the new scope from a kit or to build it from scratch. After going through the build process, seeing how much you get with the kit, and after seeing how much work it was building the replacement upper cage from scratch, I’m definitely glad I went with the kit. Cloning the upper cage required a lot of work, and that was with a pattern to work from. Making the rest of the scope from scratch would have required more time and a lot of trial and error during the design and construction process. And I’m certain that I would have spent at least as much money as well. The kit takes out most of the guesswork, yet lets the builder make some of his own modifications. If you plan on making a large, truss-tube based Dob, then you really ought to consider a TeleKit.
Though this is not a review of the TeleKit, I do want to talk up one feature that I really like — it’s the filter slide, included with all TeleKits. It is integrated with the focuser mount and keeps up to three two-inch diameter filters at the ready. A handy knob near the focuser lets you move the filters in and out of position under the eyepiece. When not in use, the filters are hidden inside their wood enclosure, keeping them dew free. Every time I use it I’m reminded how glad I am it’s there. I keep an Oxygen-III and an Ultra-High Contrast filter in mine.
Okay, I’ve made you wait long enough — so how are the images? No matter how well built or good looking a telescope is, it doesn't mean much if the images don’t measure up. Well, I was not disappointed. Indeed, I am delighted! The images are more improved in the new scope over those provided by the thirteen-inch than I expected them to be. With only about 50 percent more light grasp, and only about a 20 percent increase in resolving power, I wasn’t expecting a whole lot of improvement, but it was surprising. Faint targets are now easier to see, and objects that beforehand just weren’t available now are. Low power views are nice and contrasty, and high power views are crisp and clean. When atmospheric steadiness permits, the scope provides wonderful high magnification viewing of everything from close doubles to small galaxies to planets. A couple weeks ago at the last open house of the year, Jupiter at up to 377x was marvelous. And the previous night the Eskimo Nebula (NGC 2392) was still sharp at up to 645x! Yes, this John Lightholder mirror is amazing, as good as any I’ve observed with. If you ever consider purchasing one of his mirrors, then in my opinion you should buy it — if mine is any indication then you won’t be disappointed.
Finally — Done! Well, Almost
The beauty of a homebuilt telescope is that, just like computer software, it’s never finished. There is always something you can do to it to make it better. So is this scope done? If you’ve been out observing with me lately then you already know the answer. But for those of you who haven’t then you’ll have to wait for part three of this article series. Stay tuned.
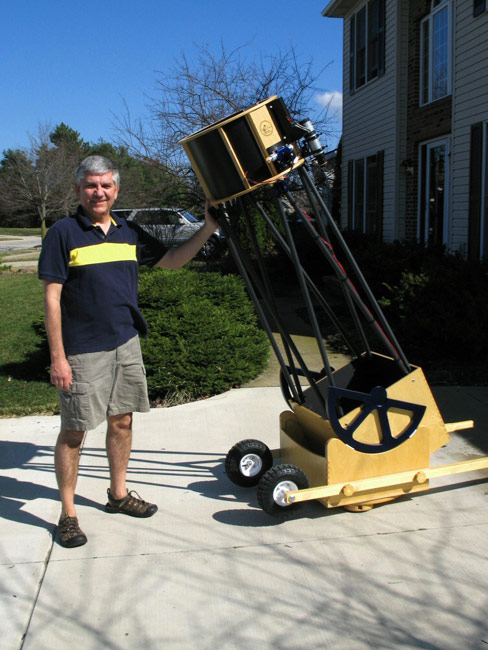
Here’s the author with his “completed” 16-inch f/4.6 AstroSystems TeleKit. But is it really done?
For more pictures and more detailed descriptions of part two of construction, please refer to my web album here:
Pictures from the initial (part one) build can be found here: